Look@HOST Network Connection Monitor
Are you connected to the Internet?

| DOWNLOAD
FREE (2.1M installable executable, instructions
below; this is a side-kick program to Look@LAN which is
cumbersome
for this type of monitoring usage) Our suggested starting place for host list. (SAVE AS after you have installed the program-you want this file to replace the installed default (blank) file.) Please set the auto-refresh rate to 60 minutes. |
LOOK@HOST is a PC application (sorry, nothing available for the MAC at present) that indicates the status of your network connections and web server via a series of behind-the-scenes PING and other network commands. We have found it extremely useful to know if our internet and other office network connections are up and running.
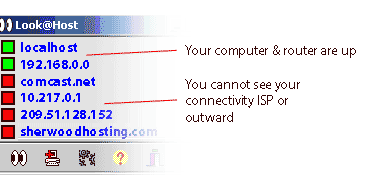
95% of our client support issues involve connectivity somewhere along the way from the back of your computer through the various levels of Internet networking. LOOK@HOST can help you determine approximately where the first dis-connection is — the list of IP addresses and domain names is ordered from closest (to your computer) outwardly to the web server and thus the first red light indicator is likely to be the culprit.
SherwoodHosting is proud to make this handy utility available to you by special arrangement with Carlos Medas.

Note: You can select which hosts are appropriate for your network topology.
(*) Because the Internet's backbone is multiply redundant, only one or
two
of your commonly accessed backbone
nodes would likely be shown
Set-up is easy:
Recommended options:
|
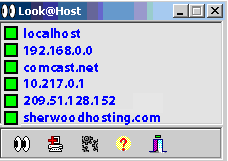
Explanation of Host
entries being monitored in this example:

Example
of your own internet connection being down:

Explanation
of command icons in the bottom menu:

Adjusting "Host" Names in Your List for checking
You can add additional names, delete, or rearrange the ordering of existing names.
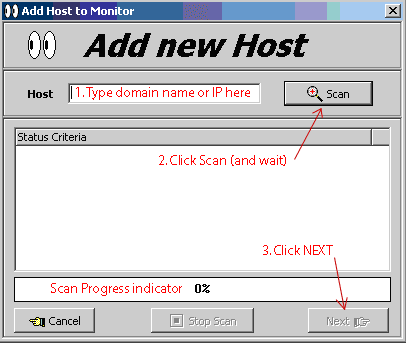
ADD: click on the red "+" in the bottom horizontal menu (2nd menu icon)

Type in the domain.com name or IP address (do not type http://)
Click SCAN - it will take a few moments for the program to scan & check if various ports exist (pop, mysql, imap, irc, ssh, rpc, etc.) and server features of the new address, please be patient. "NEXT" finishes the entry. Exit (bottom right menu icon) Look@HOST to save your new entry.
Note that if you add your own domain name (hosted by us), it would be equivalent to "SherwoodHosting.com" and give an error message that it's a duplicate.
REARRANGE: Most likely you will want to arrange the order of the host names so that the topmost name is closest to your own computer, and the bottommost would be SherwoodHosting.com.
To move positions, click and drag the green square and place it where you want it.
Exit the program (and then restart it) in order to SAVE your settings.
DELETE: Right-click on the host name to be deleted, and then click on the red X "Delete"
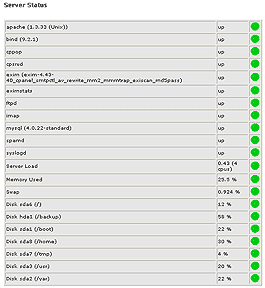
Click here (and enter your main hosting account's username and password) to see our server status, thumbnail screenshot shown below:

©2005
This help and installation guide. SherwoodHosting.com
Our thanks to Carlos Medas for making this software available.